Visionary Digiscope Camera S Bracket (Vi 331868)
This gadget is sold under various names, including "Universal telescope camera adaptor mounting bracket digital eyepiece mount" – the name under which I bought the device shown. However, it also works with sturdy microscopes; I use it with a binocular microscope.
I purchased one in January 2019. It was delivered to me without any instructions, so I thought I would offer some advice based on my experience.
Can I use the bracket with my camera?
When extended to the minimum focal length, the front of the lens must not be more than about 5 cm (2 in) forward from the position of the camera's tripod mounting point (allowing for some eyepiece projection beyond the clamp). Otherwise the camera will not fit.
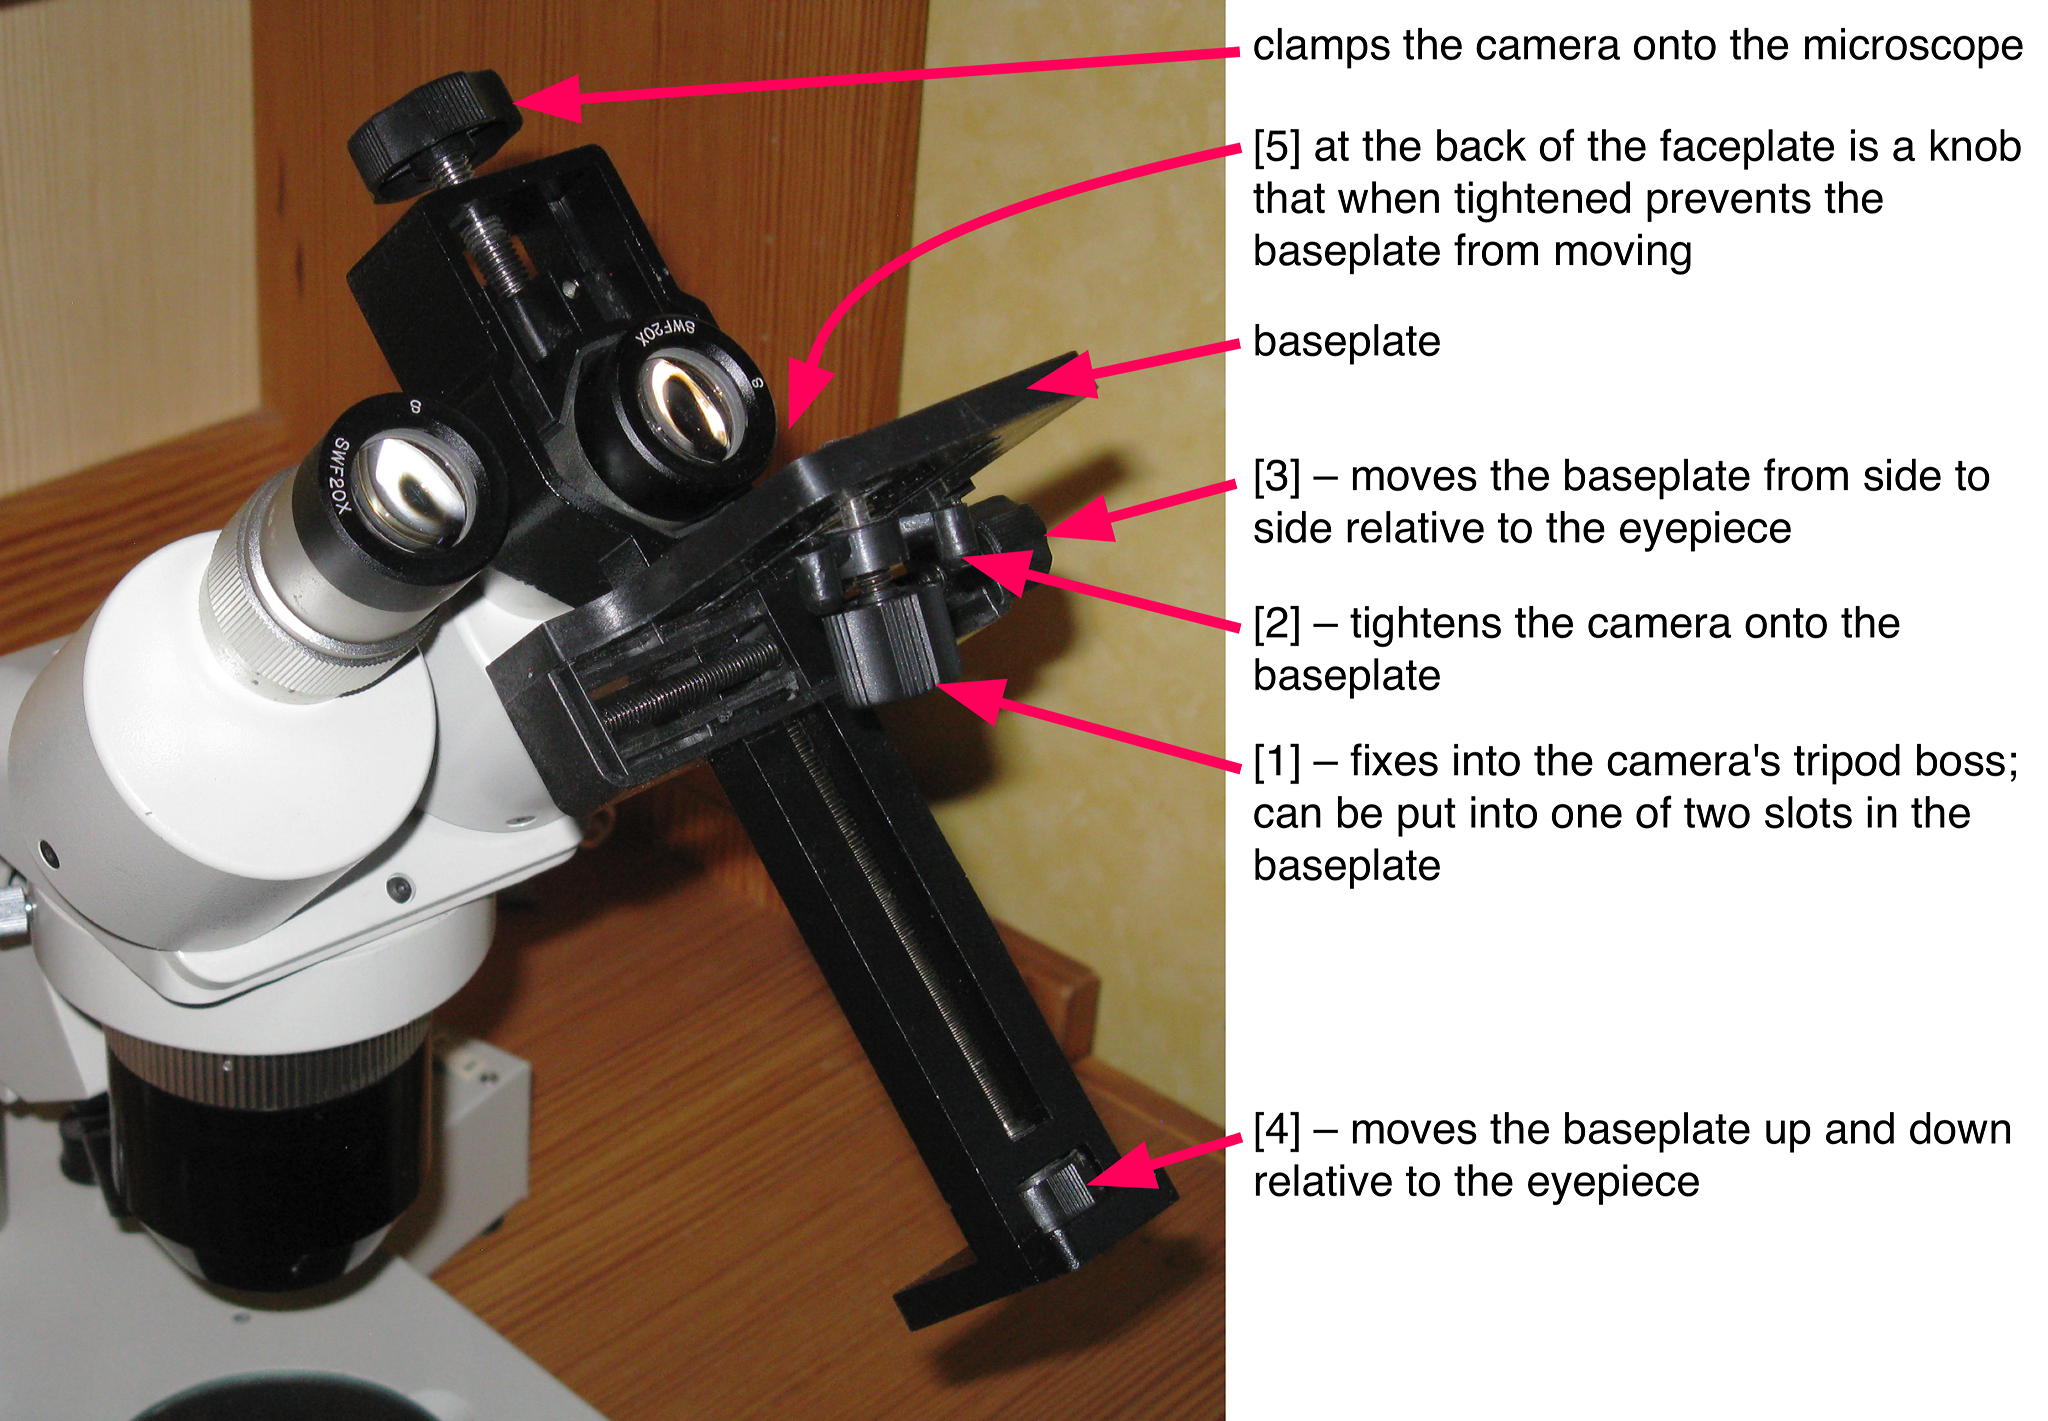
Warnings
The camera lens must be extended fully before adjusting its position or mounting on the bracket.
If your camera has a plastic tripod mounting thread, be very careful not to over-tighten [1].
Setting up
Before you attempt to fix the bracket to the microscope, ensure that [5] at the back of the baseplate is loose. Choose the right slot on the baseplate for your camera in order that the lens is as central as possible – my camera has the tripod mount to the left, so it fits on the left-hand slot. Turn [2] away from the baseplate. Tighten [1] cautiously. Make sure the camera is parallel to the edge of the plate. Tighten [2]. Now use [3] and [4] to position the camera lens in line with the clamp. Then loosen the camera from the baseplate, make sure the lens is fully extended, and clamp the bracket to the microscope, ensuring that the lens is flat against the eyepiece and more-or-less in line (adjusting via [3] and [4]). Tighten [2] again.
Now you need to make fine adjustments to align the camera and eyepiece perfectly. If you have a zoom microscope, set it to a low power. Use an object to be viewed that has a clear bright pattern; ensure it is well lit. Ideally, I set my camera to aperture priority at f/5.6 because I know from tests that this is the sharpest. I also set it to manual focus, somewhere in the middle of the range, and to delayed shooting, so that it has time to settle before taking a photo. Now focus using the microscope. When focused, use [3] and [4] to centre the image. With my camera, if I slightly depress the firing button ready to take a photo, the field of view may shrink (because the iris closes), so I find it's best to do the final adjustment of [3] and [4] with the button slightly depressed. For some combinations of eyepiece and objective lenses on my microscope, I need to leave the camera at f/4 to get a better field of view. When everything is adjusted properly, and only then, tighten [5]. This may move things slightly, so you may need to adjust [3] and [4] slightly. Perfect alignment is important, but difficult to achieve!
Now you can take a photo. Focus using the microscope, not the camera.
The field of vision is small. If you have the right software, and you want a larger image, then take multiple images at the same camera settings, and use panorama-creating software to merge them – I use Adobe Photoshop Elements, but there are free packages around.
You can see some photos I took using my binocular microscope, a Canon A710IS camera, and the bracket here:
- Surface of a fossil-bearing rock from the Wren's Nest; multiple images merged together, taken at ×10
- Close-up of a fossilized stem of Rhynia, taken at ×60